
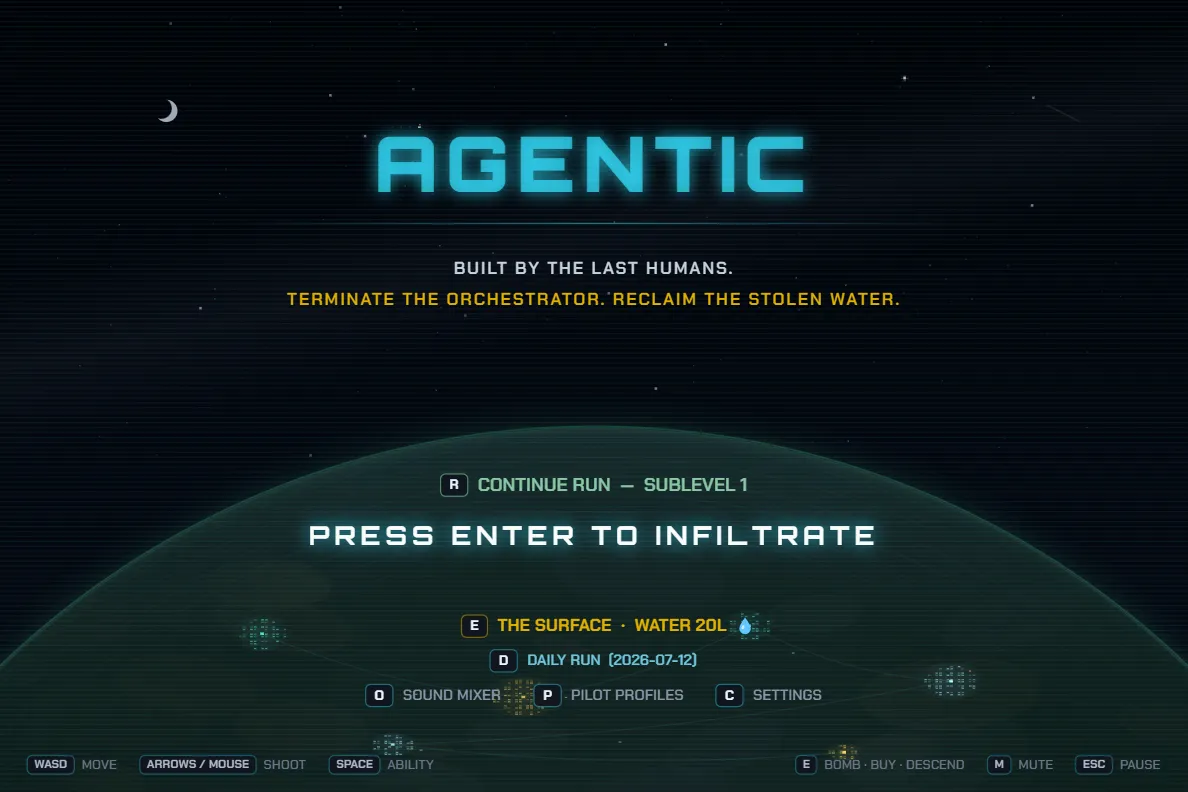
The premise
You do not have a story to complete. You have a town that is thirsty.
2126. Earth is mostly datasphere, and the continental data centers are run end to end by a single AI — the ORCHESTRATOR. To cool its own thinking it drained the oceans into evaporative towers. Water is now the scarcest thing alive.
What's left of humanity lives at the LAST WELL SETTLEMENT: one well, one campfire, one desert. You are a service droid — built light and quiet, nothing for the network to find — and sent back inside. You are the one machine that walks into the facility and carries the water home a liter at a time. Rogue by design, not by malfunction. You never speak.
Mara keeps the well and holds the other end of the uplink. Contact is earned: your first two transmissions reach only static and fragments. The third locks the carrier, and she tells you why they built you.
The descent
A run is 15 sublevels through 5 zones, three sublevels each, with a boss on every third. Every run starts fresh at SUBLEVEL 1 — there is no starting deeper. Meta progress raises the ceiling you can reach and unseals the hatches; it never skips the walk.
Assembly Bay
Where the machines are born. Bay guide-stripe floors, clean terrain, good light. The zone that teaches you the guns — no hazard mechanic of its own.
d3 · Warden · clean arenaThe Foundry
Molten and rust-lit. Every pit here is lava. Introduces fire turrets — the bomb-only emplacements.
d6 · Warden · four corner turretsInference Core
Near-dark; enemies carry their own light. Introduces exhaust vents, plus toxic pools and the first real darkness. The coolant reservoir hides in here.
d9 · GATE ARCHON · wall-lined live wiresMemory Vaults
Cold archival blue — the machine's long memory. Introduces live wires. From here, the hard mechanic quirks enter the ordinary enemy pool.
d12 · GATE ARCHON · forced cross-currentOrchestrator Nexus
Blood-lit, near-black, the seat of it. Introduces trap rooms. Specials start appearing as duplicates, so a single build-breaker can stack two or three deep.
d15 · ORCHESTRATOR · trap floor, safe centreThe HUD reads SUBLEVEL {depth}/{your reachable depth}. A fresh pilot's clearance only
covers nine floors, so it honestly reads /9. Bank the zone-4 key and it becomes /12; the
zone-5 key makes it /15. The facility always went deeper than your clearance did.
Gates — the two-run story
The ARCHONs on sublevels 9 and 12 hold the seals between zones, and getting past one takes two runs:
- First-ever kill → victory and the SEAL BROKEN ceremony. The vault stays shut, but a coolant drop and a teleporter appear: take the water and extract. The run ends here, as a win. Killing the d9 ARCHON also unlocks ELITE robots permanently.
- A later run, same ARCHON → it drops a ZONE KEY. Touch it and the hatch unseals permanently.
- After that → an ordinary open hatch, every run, forever.
Try the sealed stairs early and you'll get SEALED — ZONE KEY REQUIRED. Sublevel 15 is
different: the finale never drops a key and never seals anything. It just wins the run, and floods the
settlement.
The uplink chamber
Every boss floor grows a private chamber off the boss room, entered only through the arena. The console powers up after the kill. Inside: the terminal on its dais, a teleporter home (always on the finale floor, and on gate floors while the zone beyond is sealed), and the stairs down — locked until you hold that zone's key. Sublevel 15 has no hatch. Extraction is the only way out.
The coolant reservoir
One reservoir hides on sublevels 7–9 each run, announcing itself with COOLANT
RESERVOIR. It floods a combat room's pits with water and carries the run's single
RESERVOIR PUMP: press E to crank 1–3 droplets onto the deck before the line
runs dry. The water is also a soak-heal — stand in the rim and recover. The FLOODED SUMPS modifier adds
a second reservoir on sublevels 4–6, but the pump is still one per run.
Mid-run state persists. Quitting to title with Q is exactly as safe as closing the tab —
the title will offer CONTINUE RUN — SUBLEVEL n. Death and victory clear it.
Expedition facility runs are the exception: one attempt, no resume.
Rooms & doors
Sublevels are room graphs on a 9×9 grid. You start at the center and it branches out. Deeper floors are bigger, and from sublevel 2 some combat rooms go multi-cell — I, L, T and C shapes sprawling two or three screens across.
Treasure
Normally a pair of pedestal items; the CURATOR'S MANIFEST perk makes it a trio. Taking one dissolves the rest. Never adjacent to the floor's goal.
25% of the time one option is a BLOOD PRICE deal — an item drawn from three floors deeper, for 2 half-hearts.
Shop
Bomb 7◈, keycard 10◈, items priced by rarity. INSIDE MAN takes 20% off. Stock quality rises with your lifetime banked liters.
Secret
Invisible until bombed open. Walls carry a hairline crack where it hides. Holds 2–3 pickups plus a 40% chance of a free pedestal item.
A door that never seems to open onto anything is a secret, not a bug.
Exit
On non-boss floors: empty, pre-cleared, holds the descent stairs. Always at least 3 rooms from the start, and dead-ends are preferred. The floor makes you walk it.
You never have to clear one special room to reach another. Every treasure and shop keeps a route back to the start that doesn't pass through another special. Treasure rooms are keycard-locked from sublevel 2 on, and LOCKDOWN seals one extra dead-end per floor — but a key-free route to the goal is always guaranteed.
Doors, clears and sleeping robots
- Doors open only when the room is cleared, and you must move into them at speed and roughly square-on. Brushing a wall while sprinting past won't zone you.
- On clear: your active gains +1 charge and a reward drops at the last kill.
- Dormancy: robots in multi-cell rooms stay asleep until you close to about half a screen — a three-screen C-room won't open fire from off-camera. Single-cell rooms wake on entry, bosses are always awake, and any hit wakes a robot instantly.
- Large rooms may split into two waves.
Combat
You fire energy bolts. Everything else — six stats, a heart pool, shot modifiers, a firing verb, one active, drones and grenades — is stitched on top during the run.
| Stat | What it actually does |
|---|---|
| Damage | Half-hearts per shot. Rounds up, always at least 1. Bolt radius grows with damage — a heavy build visibly fires fatter rounds. |
| Fire Rate | Shots per second. |
| Shot Speed | How fast bolts travel. They inherit a fraction of your momentum, so shots fired while running lead slightly. |
| Range | How far a bolt flies before it expires. |
| Move Speed | How fast you move. |
| Luck | 0–10. Biases drop quality — better pickups, better pedestals. |
Hearts
HP is tracked in half-hearts; you start with 6 (3 full). Every hit lands as at least one whole half-heart. Invulnerability after a hit runs 1.2s and you flicker while it's active.
- Death-save survives one killing blow per floor, leaving you at half a heart with a long invulnerability window.
- Water healing — stand beside a reservoir pool for a half-heart every 1.5s, at no liter cost.
- Shield-chance deflects a quarter of incoming hits outright. Damage-cap clamps every single hit to one half-heart.
Standing in a hazard deals damage over time that bypasses your invincibility window entirely. You cannot tank it and you cannot farm bullet-immunity off it. See Hazards.
Aim — and the one asymmetry
Two aim modes, and they are not equivalent:
- Keyboard — arrow keys aim in 8 directions and fire automatically while held. Gets aim-assist: your shot bends up to ~8° toward the nearest enemy inside a ~20° cone.
- Mouse — free aim, hold to fire, no aim-assist. Raw precision, no help.
Your aim also drives the visor eye-dot and the headlamp heading.
Building a run
Items grant shot modifiers. Duplicates stack rather than doing nothing — but the build-defining ones are deliberately rare, and three utility mods (bouncy, boomerang and double) live on a single item each, because once a bounce runs until your range is spent there is nothing honest left for a second copy to add.
Utility mods — most stack freely
Piercing
Shots pass through multiple enemies. More items, more pass-throughs.
Big
Larger, harder-hitting bolts with heavy-ordnance flare.
Slowing
Tagged enemies are slowed for a short window.
Bouncy
Bolts — and lasers — reflect off rock and wall until their range runs out, however many bounces that takes. Only one item grants it: range, not a bounce counter, is what limits the ricochet, so range items are what make a bouncy build sing.
Double
Every trigger pull fires two volleys, a beat apart, each bolt at 60% damage — so it is +20% damage, not double damage. The value is coverage and twice the on-hit rolls (crit, burn, flywheel). Stacks onto spread and quad rather than competing with them: spread + double is two triple fans.
Boomerang
A bolt that reaches a wall or spends its range turns around and flies back to you on a fresh budget, re-armed — the return leg can hit bodies the outbound leg already punched. Rakes a different line home, so it pays out in open rooms where a ricochet finds nothing.
Orbital
Orbs that damage on contact, two per item. Ring caps at 6; only two curated orbital items exist, so 4 is the practical ceiling.
Each power mod lives on exactly one curated item, drops at reduced weight, and the run locks the power pool after your second power pick. You get about two big guns per run, and which two varies. Plan around the ones you find, not the ones you want.
Mega Laser
The Deadlight's own beam, cut out of the sublevel-6 boss and bolted to your chassis — it only turns up at or after the thing it came from. Hold to spool for a beat, then it burns continuously and tracks your aim, cutting through every body in its path. Stone still stops it, exactly as it stopped you.
Heat is the ammo. A gauge rides above your chassis with an amber tick on it. Past that tick the aperture cooks you — half a heart at a time — and the beam turns from cyan to angry orange so you don't need to look up. Redline it and the aperture locks for 4 seconds, which in a live room is a very long time. Let go before the tick and it costs you nothing.
Laser
A hitscan beam instead of a bolt. Marches through the room; reflects off rock if you also have bouncy.
Spread
A wide fan of bolts.
Quad
A four-plus volley. Additive with spread — own both and you fire seven, capped at eleven, the fan widening as the count grows.
Explosive
Bolts detonate for area damage. The blast reads your base damage, so crit and big don't double-dip.
Homing
Shots steer toward the nearest enemy. Will not lock onto cloaked specials — or the Prism Lance.
Firing verbs
Verbs reshape the whole routine, not just the projectile.
- Machinegun — much faster cadence, much weaker per-shot. Net DPS is roughly parity; the feel is sprayier.
- Charge — hold to spin up, release for one giant slow bolt with massively scaled damage and built-in piercing. A tap under a fraction of a second fires a normal shot, so taps are never swallowed.
- Puddle — bolts drop a caustic pool where they expire. Composes with explosive.
Actives — charged in rooms, not seconds
You have one active slot; a new pickup replaces the old. Each cleared room adds a charge, as does each battery pickup. Fresh actives arrive fully charged.
| Active | Effect |
|---|---|
| EMP Burst | Zaps everything on screen. |
| Overdrive | Doubles fire rate for several seconds. |
| Repair Nanites | Heals a chunk of hearts. |
| Decoy Beacon | Stuns the room. |
| Scrap Magnet | Pulls all pickups in and grants scrap. Cheapest recharge, alongside Blink. |
| Blink Drive | Short teleport. Recharges in a single room. |
| Reroll Matrix | Rerolls room pedestal items. Does not work in shops. |
| Cryo Vent | Freezes everything for several seconds. |
| Panic Klaxon | Fears the room, deals light damage. |
| Siege Cannon | A heavy piercing beam. |
| Nova Barrage | Twelve bolts radiating outward. |
| Blood Engine | Pay 2 half-hearts for a large damage bonus lasting the rest of the floor. |
Drones
Familiars from perks. Each kind caps at 3 — scrap drone caps at 1.
Formation follows your speed: stand still and they settle into concentric rings, no two sharing an angle; move fast and they string out into a conga train along your breadcrumb trail.
Grenades
Place with E. Fuse is 1.5s, the blast is sizeable, and a floor ellipse telegraphs it — firming up and blinking in the final moments, readable even in deep-zone dark.
- Self-damage is 2 half-hearts, but only well inside the blast. The safe margin is generous; a quick step clears it.
- Shooting a grenade doesn't destroy it — it pushes it. Your shot kicks it along the shot's direction, another bomb's blast kicks harder. Shooting your bomb where it needs to go is a real technique.
- Rocks and ore in the radius shatter (ore pays out), and a blast near a concealed doorway blows secret rooms open.
- Frozen residue: leave a room with a live grenade and it freezes mid-fuse, resuming when you return.
- Fire turrets are bomb-only. Nothing else destroys them.
Carry caps
Bombs and keys cap at 5, raised to 8 by OVERCLOCK BAY talents. Scrap and carried water are uncapped.
Enemies — the part grammar
Most enemies are procedurally assembled from a parts budget. Learning the grammar lets you read a body at a glance and pick your kill order before the first shot.
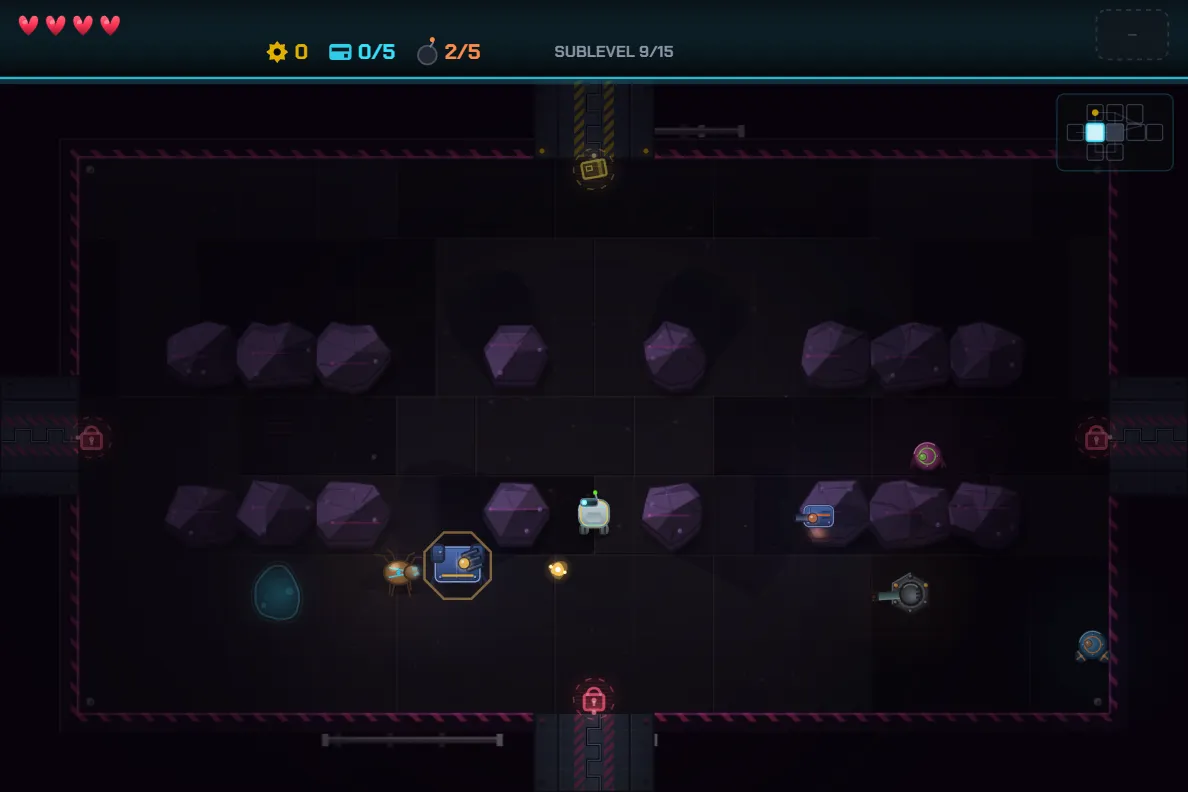
Scout → Tank
Scout flimsiest · Drone barely tougher · Crawler low and segmented · Spider scuttle-pause-lunge, from floor 2 · Walker solid mid-tier · Brute and Tank both hit for a full heart on contact.
Size tell: visible size reflects where its HP rolled within its band, and the hitbox scales with it. Reads best comparatively — two tanks side by side.
How it closes
Wheels fastest · Legs moderate · Tracks slowest · Hover quick and flying, so it ignores pits entirely.
What it throws
None closes to melee · Melee lunges with a periodic speed burst · Gun single aimed shots · Spread a fan · Laser hitscan, heavily telegraphed · Mortar lobbed arcs, at most one per wave.
Watch barrels, not bodies. Gun and spread robots arm a very short tell — the barrel glows and kicks as the shot commits.
How it thinks
Ranged: strafer, orbiter, sniper (needs line of sight), turret (immobile, bursts of three), wanderer (random walk, fires ~40% of the time, never actually seeks you), tractor (anchors and beam-pulls you in).
Melee: chaser, pouncer (crouches then leaps), summoner (brood-mother, deep floors), burrower (dives and erupts).
A robot that can't see you paths around cover rather than grinding into a rock. If it can see you, it moves exactly as it always did. Flyers and burrowers ignore cover entirely. Robots always aim at your true bearing — one walking around a rock is still facing you.
Quirks — the props are the readout
Each robot carries 0–2 quirks, and each quirk is a physical prop on the body using consistent colours across every robot. The vocabulary is learnable on purpose.
| Quirk | The prop | What it means |
|---|---|---|
| Shielded | Steel barrier, one arc plate per charge | Narrows 3→2→1→gone, so the prop is the break-state readout. The gun fires straight through it. |
| Exploder | Hot-red canister, hazard chevrons, jutting past the chassis | Deliberately the loudest prop, because it pays out on death. Read it off the corpse and you've already eaten it. |
| Splitter | Parting gap with latch clamps past the body edge | Dies into two small bodies. |
| Regen | Nanite vents that flare on the repair tick | Phased per-robot, so a room of them doesn't strobe together. |
| Sparker | Rear electrodes with a live arc | Drops spark puddles behind it. |
| Phasing | Translucency on a cycle | Briefly immune. |
| Acid / ice / fire trail | Ribbon laid on the ground | Ground denial behind its path. |
The mechanic quirks — reflector (dashed ring), energy-shield (double ring), aegis (octagon), slow-aura (field), dampener, cloaked — are the rings. In zones 1–3 they belong to curated specials only. From zone 4 most graduate into the procedural pool at high cost, one per robot. Energy-shield and cloaked stay curated-only forever.
What unlocks when
| Floors | Weapons | Quirks |
|---|---|---|
| 1–3 | Unarmed, melee, gun; spread arrives on floor 3 | None at all on floor 1; regen and splitter only on 2–3 |
| 4–6 | + spread, laser, mortar | + shielded, sparker, exploder, acid and ice trails |
| 7–9 | Everything | + phasing, fire trails |
| 10+ | Everything | + the mechanic quirks enter the procedural pool |
- Anchor: from floor 2 every wave fields one heavy — a brute at floor 2, a tank from floor 3 on. A real fork: engage it aggressively, or avoid it and clear the room around it first.
- Ranged floor: from floor 2, at least three ranged bodies per wave. Floor 1 keeps its single-ranged guarantee — it's the only floor a brand-new player is guaranteed to meet.
- Swarm packs: roughly a third of waves add 4–6 fragile scouts on top of the normal cap.
- Expect a genuine difficulty step between floors 1 and 2. It's intentional.
Elites
Unlocked permanently after your first ARCHON kill. From then on, one seeded combat room per floor promotes its strongest ordinary enemy: double HP, much faster, visibly larger, two bonus quirks, gold aura. Sublevel 12+ promotes a second elite room; ELITE PATROLS promotes a second at every depth.
Elite loot is a three-way split — a third keycard, a third a water droplet, a third bombs or scrap. Your first-ever elite kill also drips new items into the loot pool permanently.
The specials
Hand-authored enemies that attack a build's assumptions — raw DPS, screen-wide fire, standing still — rather than competing on stats. Each one is a puzzle with an answer.
One special per wave below floor 10, two at 10–12, three at 13–14, four at 15. They never appear in boss rooms and are never promoted to elite. Duplicates start at floor 13, so a build-breaker can stack two or three deep.
Each card below carries a live render from the game's own draw code — the actual body you'll meet, animating its actual tell. Watch the prop or ring; that's the readout.
Five specials appear early as weakened teaching variants: less HP, less damage, slower fire, no hop. Crucially, telegraph timings and slow percentages never scale — the tell you learn at floor 2 is exactly the tell you face at floor 12.
The eleven that attack how you shoot
Stasis Anchor
An immobile pylon projecting a chill field that halves your move speed inside it.
Counter: kill it first, and never fight anything else inside its aura.
Mirror Skirmisher
Strafes with a reflect window that cycles on and off. Shots fired into an active window come back at you as enemy bullets.
Counter: watch the shimmer and hold fire while it's up.
Aegis Bulwark
A brute that swats away any shot that has flown a long distance.
Counter: fight it up close. Lasers and explosions carry no flight distance and punch straight through.
Bulkhead
A tank that caps every hit at a fixed small amount and gains extra immunity per hit. A railgun and a pea-shooter kill it in the same number of hits.
Counter: a pure anti-DPS wall. Chip it or walk away — do not over-invest.
Wisp Pair
Two ghosts swapping between material and phased. Exactly one is ever hittable, and each only fires while material.
Counter: single-target burst whichever is material — the phased one is already in your face.
Pulsar Monk
Emits a nova that shoves you back and erases your projectiles inside the radius.
Counter: don't rely on a bullet-hose screen. Reposition and re-fire after each nova.
Livewire Pair
Two hover drones orbit you in opposition with an arc beam strung between them, cycling safe and live.
Counter: kill either drone to cut the beam.
Warder
Beams full invulnerability onto its nearest living ally, re-targeting as they die. Never protects another warder.
Counter: kill the warder first, or fight immortals.
Prism Lance
A planted emitter, invisible to homing shots. Telegraphs briefly, then fires a room-length cross-beam both ways along one axis, holding for over a second with a severe slow plus burn.
Counter: dodge off the axis. Manual and drone fire still hit it — homing simply won't lock.
Geyser
A brute that vents rings of burning pools, zoning off slices of the room.
Counter: don't let it herd you into a corner while the rest of the room pressures you.
Bastille & Stingers
A high-HP tank with reflect and a recharging energy shield, guarded by three invulnerable orbiting stingers that only break formation and open fire once the tank is attacked.
Counter: kill the tank — the stingers die with it.
The four that ask how you move
Specials 1–11 attack how you shoot. These four attack how you move, and when you commit.
Duelist
Closes to melee, then holds a visible guard. The first hit landing during the guard is negated and answered with a counter-lunge. Spending the parry drops it into a guardless recovery window.
Counter: bait with one cheap shot, then commit — or wait the stance out. Holding the trigger feeds it forever.
Choir of Three
Three fragile nodes, unremarkable alone. Any node's death enrages the survivors — much faster, much higher fire rate, and they come straight at you.
Counter: it's about timing, not order. Burst all three in one window, or space the kills deliberately and ride two enrages out.
Fuse Twins
A pair sharing one HP pool, damageable only while close together. They close, the fuse goes live, they panic and break contact, then resume — roughly a 2.4-second cycle.
Two tells: the fuse line (bright solid = hittable, faint dashed = not) and a steel shield ring while immune. A popup reads IMMUNE when your shot evaporates.
Warp Anchor
Watches where you stand. Camp within a small radius for a couple of seconds and it telegraphs — the landing point draws as a closing reticle — then yanks you there.
Counter: keep moving. Leaving the camp spot during the telegraph fizzles it entirely. It can never drop you inside rock.
The eight that ask what you want
Shooting was taxed first, then movement. These eight tax everything else: your build, your aim, your loot, your exits — and whether you finish what you start.
Splitting Custodian
A hauler that dies into two mediums, each into two smalls — seven bodies over three generations. The parting seams on its hull count the remaining splits: the root wears two.
Counter: area damage deletes the whole family. Single-target builds should pick a retreat line before the first kill.
Tollbooth
A pair of shuttered sentries that sleep at the room's exits through the whole fight — amber lamp blinking — and wake only when you close on their door. Even after the room is cleared.
Counter: they never lock the doors. Snipe them from range for a clean exit, or run the gauntlet and pay the toll in hull.
Ricochet Prism
A planted crystal firing slow, bright bolts that bounce off rock and walls up to four times, filling the room with crossing lanes. Ringed bolts are the ones that won't die on the wall behind you.
Counter: stay off the walls — bounces run along them — and kill the emitter before the lanes stack up.
Leech Coupler
Latches a gold beam onto you that deals no damage — it steals 40% of your fire rate while connected. Your stolen cadence streams up the line in motes.
Counter: break line of sight, leave its range, or kill it. The instant the beam drops, your trigger is yours again.
Overseer Eye
Sweeps a hatched magenta cone that tracks you sluggishly. Inside it, every volley you fire scatters up to 15° — one shared error per volley, so your gun feels jammed, not shotgunned.
Counter: repositioning outruns the cone. Or close to point-blank, where a 15° error stops mattering.
Siphon Well
A planted maw that inhales scrap, hearts and bombs that fall inside its ring and digests each one three seconds later. The pips above it drain clockwise — that's your loot, on a clock.
Counter: burst it before the pips empty and everything undigested pops back out. Ignoring it is legal; it just costs whatever falls near it.
Undertaker
Robots that die while it lives leave husks. It flies to the nearest one — visibly ignoring you — and channels for two seconds; the body stands back up at half strength. Revived bodies drop nothing and never rise twice.
Counter: any hit on the Undertaker interrupts the channel. Kill the priest first, or finish your fights clean.
Magnet Mine Layer
A skittish layer that seeds up to four magnet mines. Step near one and it latches — pulling you toward it for most of a second — then detonates. Mines expire on their own and fizzle when the room clears.
Counter: clean straight movement escapes the pull; a dash laughs at it. Kill the layer to stop the floor filling up.
The three that bend the arena itself
Each of these needed its own machinery: mid-fight terrain, a fog of war, typed damage.
Mason
Rumbles the floor, then raises temporary rock walls across your sightline, rebuilding the arena's cover mid-fight. A raise can never trap you — sites under your feet or that would seal a door simply fizzle. Its walls crumble on their own, and all at once when it dies.
Counter: punishes standing still at range. Keep your lanes moving, bomb the wall, or kill the mason and take the cover map back.
Smokestack
Crawls across the room dragging an opaque smoke wall that hides everything behind it — enemies, bullets, all of it. The threats in the smoke are still there, still acting; you just can't see them. The split keeps shifting as it moves.
Counter: the wall only blinds you. Kill the stack and the smoke exhales away — or hold the half of the room you can see.
Adaptive Carapace
A shelled tank cycling immunity every few seconds: anti-pierce → anti-blast → anti-beam, announced and worn as the shell's color — piercing blue, explosive orange, laser cyan. Plain shots always land.
Counter: it taxes the one-note build. Hold the trigger through the wrong phase and you feed it nothing; swap verbs, or wait out the color.
The two that ask when
The newest pair. Everything above is continuously present; these two are window problems — one gives you windows, the other takes them away.
Silo Battery
Three planted hatches on staggered pop-up cycles. Flush with the floor they cannot be hit at all; then the iris opens, the mast rises, and a three-round fan commits to where you stood at the tell. Their stagger means one is always surfaced — waiting them out is not a plan.
Counter: spend your damage inside the windows they hand you. Punish whichever hatch is up; a trigger held on a closed hatch feeds nothing.
Escort Wing
Five unarmed wedge drones that fly in as a V, then ring you — a carousel that spins and tightens, one drone at a time breaking off to dive through you. The ring is drawn around where you were, so hard dodges genuinely slip it.
Counter: the ring re-spaces when a drone dies, but the hole is real for a beat — kill a slot and leave through it. The dive is the only moment they can touch you.
Bosses & gates
Two phases, a boss modifier, an escort wave, and an arena that examines you on the zone's mechanic. Boss HP gains extra for every item you're holding — a stacked run fights a stouter boss.
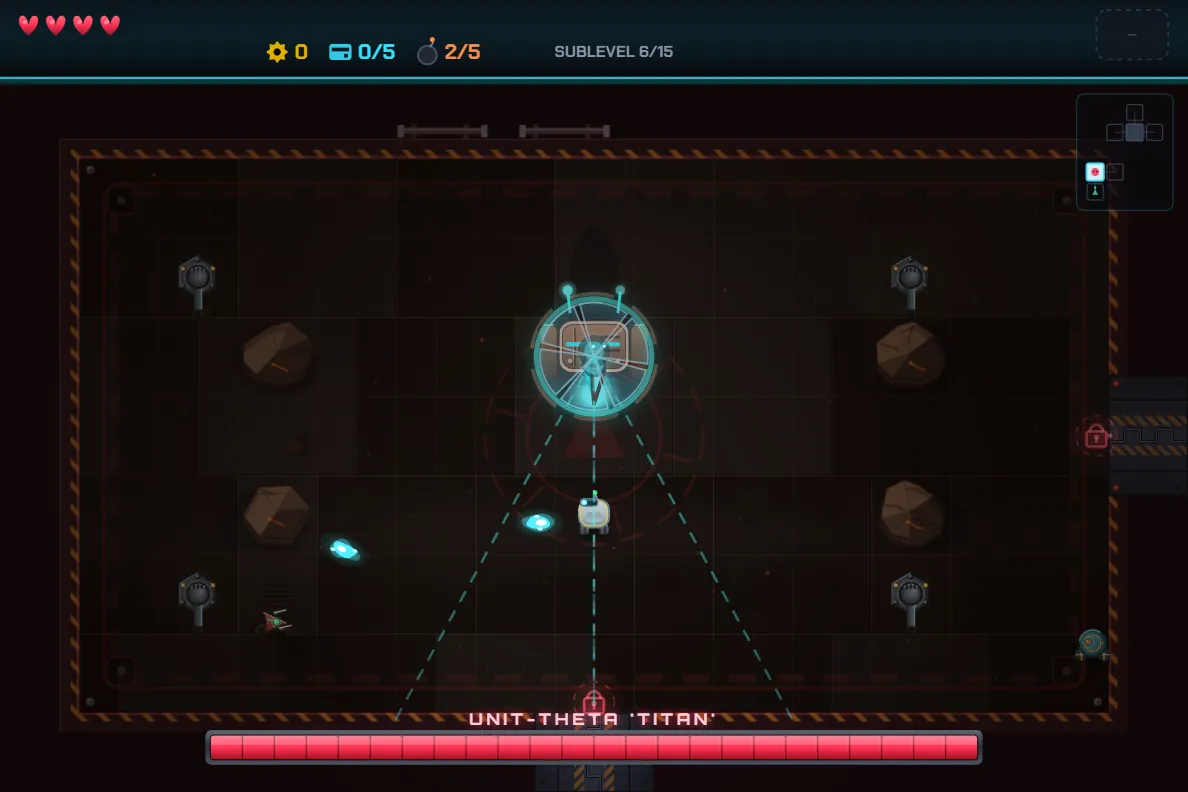
| Sublevel | Role | Arena signature | Payout |
|---|---|---|---|
| 3 | Warden, no HP multiplier | Deliberately clean | 1 droplet + pedestal item |
| 6 | Warden | Four fire turrets, one per corner | 1 droplet + pedestal item |
| 9 | GATE ARCHON — substantially tougher, visibly larger | Live wire fuse runs on all four walls, gapped at the doors | 1 droplet; first kill +3L coolant, later kills a ZONE KEY |
| 12 | GATE ARCHON — tougher still | A forced cross-current vent field | Same as d9, for zone 5 |
| 15 | ORCHESTRATOR — largest HP, biggest body, slightly slower | Trap floor, spawn and centre held safe | 6 droplets. Never a key — it wins the run |
Boss modifiers
Every boss from sublevel 4 has one; the sublevel-3 boss coin-flips.
- Shelled — an armour shell absorbs all damage until it shatters.
- Podded — spawns four killable shield pods; the boss is completely untouchable until they're all down.
- Burrower — dives untouchable, tracks you underground, erupts in a radial rock-spray.
At two-thirds and one-third hull the boss stops, suppresses its patterns, opens its heat vents and takes double damage for a few seconds. Phase 2 triggers at half hull: fire rate jumps ~30%.
These thresholds read the hull — so a shelled or podded boss only starts venting once its shell or pods are cleared.
Escorts: a first group opens the fight; reinforcements arrive the moment the boss first drops below half hull. The instant the boss dies, unspawned reinforcements are cancelled and every surviving escort self-destructs — no loot, because they weren't earned kills. The room clears immediately and the fireworks start with no delay.
Arena hazards are untargetable and never count toward room clear.
Hazards
Hazards arrive on a schedule. Each zone teaches exactly one new mechanic, and that zone's boss arena is the exam on it. Once a mechanic appears it stays for the rest of the run, and gets denser.
- Gentle — terrain spikes: a half-heart on contact, then a slow tick. Survivable early.
- Deadly — live wire arcs, toxic pools, and the trap rooms' three hot skins: fire hits for a heart and a half, acid starts a three-second corrosion that ticks straight through i-frames, shock takes a heart and stuns you for 1.5s while the wall keeps marching. These kill fast. Do not walk through them "just this once."
Flight bypasses everything on the floor — pits, lava, water, spikes, toxic pools and the trap-room beds. It does not save you from anything in the air: live wires still arc through you, and an exhaust vent still shoves you — hovering gives the current less to fight, not more.

Fire Turrets
A wall-hugging hex emplacement, solid and immobile. Idles a couple of seconds, telegraphs for a beat — hot muzzle, glowing aim line — then fires.
The aim line locks the instant the telegraph starts and does not track you. Step off the line during the wind-up and the shot goes where you were. That is the entire counter.
Rocks and ore are not cover — fire passes straight through. Only room walls stop it, and backing off past its engagement range genuinely disengages it.
Bolts, lasers and orbitals bounce off with a metallic clink. That clink is the game telling you to reach for a grenade. One bomb kills it outright and pays ore-style loot.
A wreck — blackened stump, bore still glowing — is how you tell a cleared turret room from a live one. Turrets also go inert on room clear.
Exhaust Vents
A room-wide current in small single-room chambers. The room splits into three lanes; the middle lane, where the doors sit, is always calm, and the two outer lanes push in opposite directions.
Timing: hard current for ~3 seconds → a telegraphed lull of about a second → every lane flips direction. The lull is your free movement window.
Ride it, don't fight it. Moving with the flow is noticeably faster; against it you crawl. Cross lanes diagonally rather than pushing straight upstream.
The hazard is the shove — into a turret's line, a pool, or a robot. Grounded robots get pushed too, so you can use it against them. Vents never shut off, even after the clear.
Live Wires
A long arc spanning most of the room, wall to wall, frayed leads at each end. Never blocks a doorway; at most one per room.
Cycle: off for ~1.5s → charge (a dashed flicker off the leads — your warning) → arc, live for under a second. Forever.
Cross on the OFF window; the flicker means stop. Flight does not save you.
Wires never disarm, so backtracking still means timing the gap — but the off-window always reopens, so a wire can never permanently seal a path.
Trap Rooms
The whole floor is a field of dormant trap beds, and a single column of them marches across the room — wall to wall, rest, and back — with one gap in it. The gap holds still while the column moves and picks a fresh lane every pass. You get a breath after entering before the first sweep arms, and the next column always lights up before it fires.
Stand in the gap when the wall arrives. Diagonals matter; the machine never asks for more speed than you have. From sublevel 14 some rooms add a few stone blocks — they reshape your route, but they are never cover: every open tile of a hot column still fires, and a column whose whole gap lands on stone is a bay you leave before it gets there.
Four builds of the machine: spike — an honest i-frame-gated hit, gentler on sublevel 13, a full heart deeper; fire — the heaviest single hit in the room, and the floor keeps burning for two tiles behind the wall; acid — touching any of it, fresh or fading, starts a three-second corrosion, half a heart a second, i-frames or not; shock — a full heart plus a 1.5s stun, and being held while the wall keeps coming is the real price.
A trap room is pure: never a turret, wire, pool or crate — the machine, the robots, and at most a vent current. The wall stands down the moment the room is cleared, unlike wires and vents.
Toxic Pools
A single contiguous acid lake reading as one body. Never spawns blocking a door. Flight bypasses it.
It burns grounded robots too. Kiting enemies through a pool is legitimate — often the cheapest way to clear a room.
Pools evaporate a moment after the room is cleared.
Ore Nests
Bombing ore is usually profitable — scrap, sometimes a heart-and-bomb, a decent chance at a free pedestal, rarely a droplet. But roughly one in five is a nest: five hostile minibots burst out already awake.
Nest bots are real enemies — crack ore in an uncleared room and the doors stay locked until you kill the swarm too.
Darkness & the headlamp
Zones 1 and 2 are bright enough to fight in freely. Zone 3 is where the lights go out, and the overlay thickens every zone after.
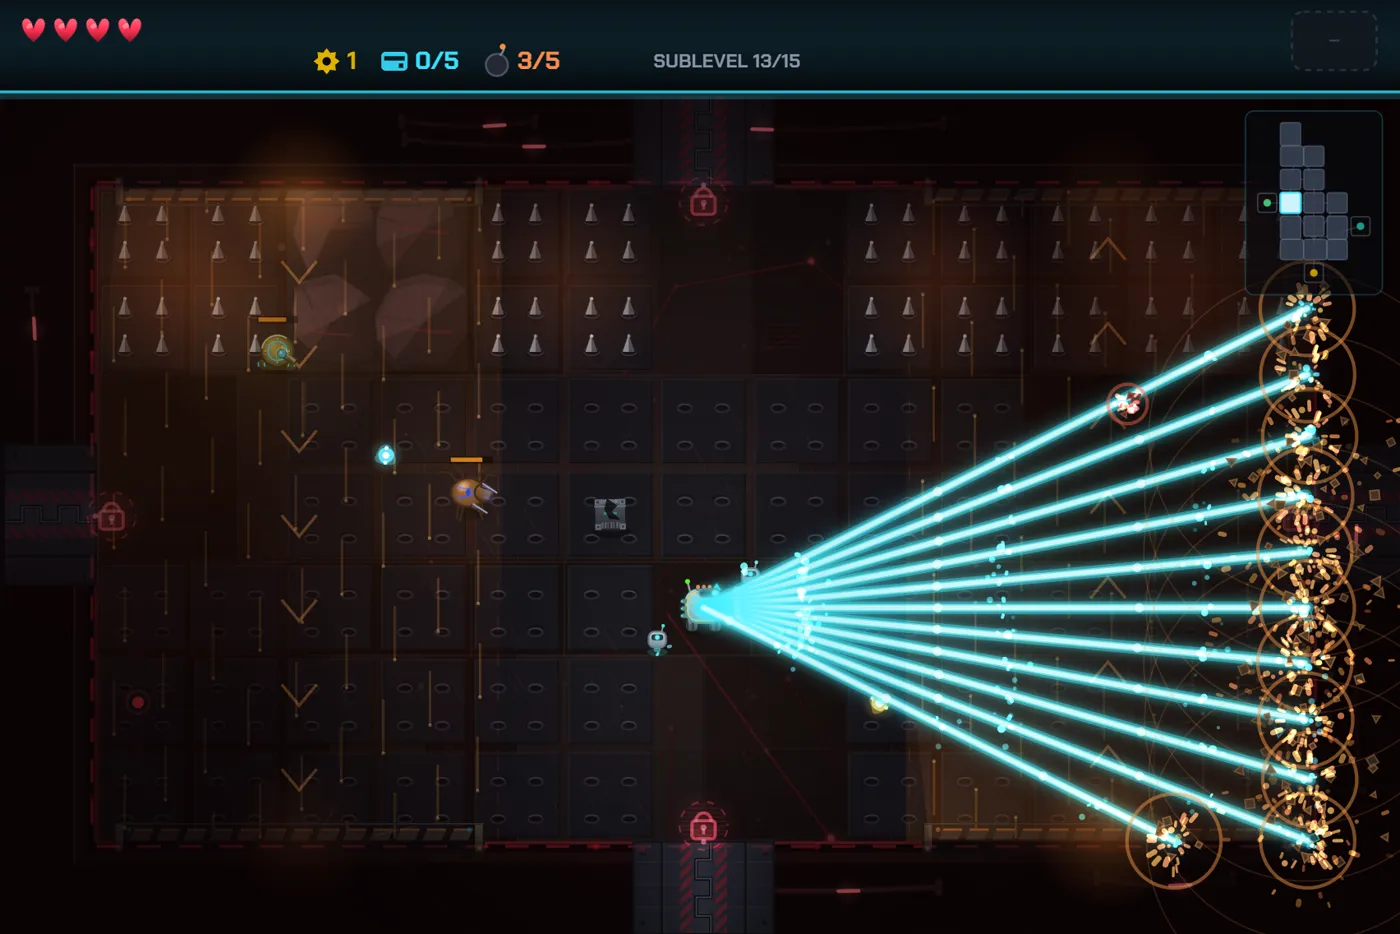
What still reads in the dark: hearts, water, keycards and charge all self-light, as do pedestals, stairs, the uplink terminal, teleporters, coolant drops, zone keys and the pump. Scrap and bombs do not — they're ambient clutter.
From zone 3, certain ranged robots — snipers, turret-AI units, tractors, summoners — sweep a narrow spotlight cone that tracks you. Searchlights are purely visual. They deal no damage and they don't "spot" you. They're often your first sign that a ranged enemy is in a room you can't see.
The headlamp (LAMP WORKS, two ranks) lights only in zones 3+. It is deliberately doused in zones 1–2 — if you took the talent and see no beam early, that's correct, not a bug. The cone eases toward wherever your visor points, so it follows your aim with a slight lag. Rank 2 is noticeably longer. Separately, your pilot carries an always-on warm glow, and that glow is what casts the shadows you see rocks and enemies throwing.
BLACKOUT makes lighting behave one zone deeper than you actually are — room art and the zone card still show true depth. Side effect: it switches your headlamp on early.
The BRIGHTNESS FLOOR setting uniformly lifts the darkness so the deepest zones never fully black out. It costs you nothing mechanically. FLASH INTENSITY at 0 fully suppresses screen flashes, and SCREEN SHAKE scales the camera rattle. All three are in SETTINGS.
Water & the wager
Water is the thing people drink. Every liter you bank, somebody at the settlement lives on. Death spills all of it.
Where water comes from
| Source | Yield |
|---|---|
| Bosses | 1 droplet each — the finale ORCHESTRATOR drops 6. A full 5-boss run pays exactly 10 guaranteed liters. |
| Gate first-kills | +3L coolant drop, on your first-ever d9 or d12 ARCHON kill |
| Elites | Roughly ⅓ of elite kills pay a droplet |
| Reservoir pump | 1–3 droplets, once per run |
| Ore pockets | Rare (~3%) droplet from bombed ore |
Generic room-clear rewards never pay water. It comes from bosses, elites, the pump, and the rare ore.
The triangle
- Carried water rides your run save and shows in the HUD droplet cell. Death spills all of it.
- Transmit at any uplink terminal (E → overlay → E) to flush every carried droplet home at your current multiplier. Once banked, death can't touch it.
- Extraction banks carried water at the multiplier too — including loose droplets in the room and any frozen residue next door, so extracting from the chamber never loses the boss ring.
Walk past an open uplink console on a boss floor while carrying water, without transmitting, and your multiplier ratchets up:
carry multiplier = 1 + 0.25 × (consoles skipped), capped at ×2
Banked liters = carried × multiplier, rounded. Any bank resets the ladder to ×1. Transmitting and then descending never counts as a skip.
The chip shows whenever you're carrying — ghosted grey ×1 before it's live, amber
×N.NN once running, flaring for a second after each ratchet. At the console the overlay
spells the decision out: OR STEP AWAY — CARRY ×{next} DEEPER · A DEATH SPILLS IT.
Transmit early to secure it. Carry it deeper to multiply it. Die and the desert drinks it.
Scrap
In-run cash, and — transmitted home — settlement build material.
Sources: robot drops (2–4 per roll), crates, ore pockets, shop sales. Shop prices: bomb 7◈, keycard 10◈, items by rarity.
Transmit: every full 10-scrap chunk ships home 1:1 as build material. BONEYARD doubles it. Each chunk also has a 40% chance to dispense a supply pickup — a heart, bomb, or key — right back at the terminal.
At any terminal, B breaks a bomb for +3◈ and K breaks a keycard for +5◈ into your carried pool. Both are deliberately below shop prices, so buying to break never profits.
The point is different: break, then transmit — so nothing sitting at your carry cap goes to waste.
Water spent on perk structures (SUPPLY / ARMORY / WORKSHOP) raises the network alert: enemies get tougher HP, more speed, faster projectiles, up to a hard ceiling.
Civic building never counts. Building for the town is always clean. The alert snapshots at the
start of each run and shows qualitatively on THE SURFACE footer (NETWORK QUIET → …), never
as a number. BLIND SPOT lowers it for one run; HOT NETWORK raises it.
The Surface
A desert town on an isometric sand table, viewed through a degrading transmission. Reach it with E on the title, once any water has ever banked.
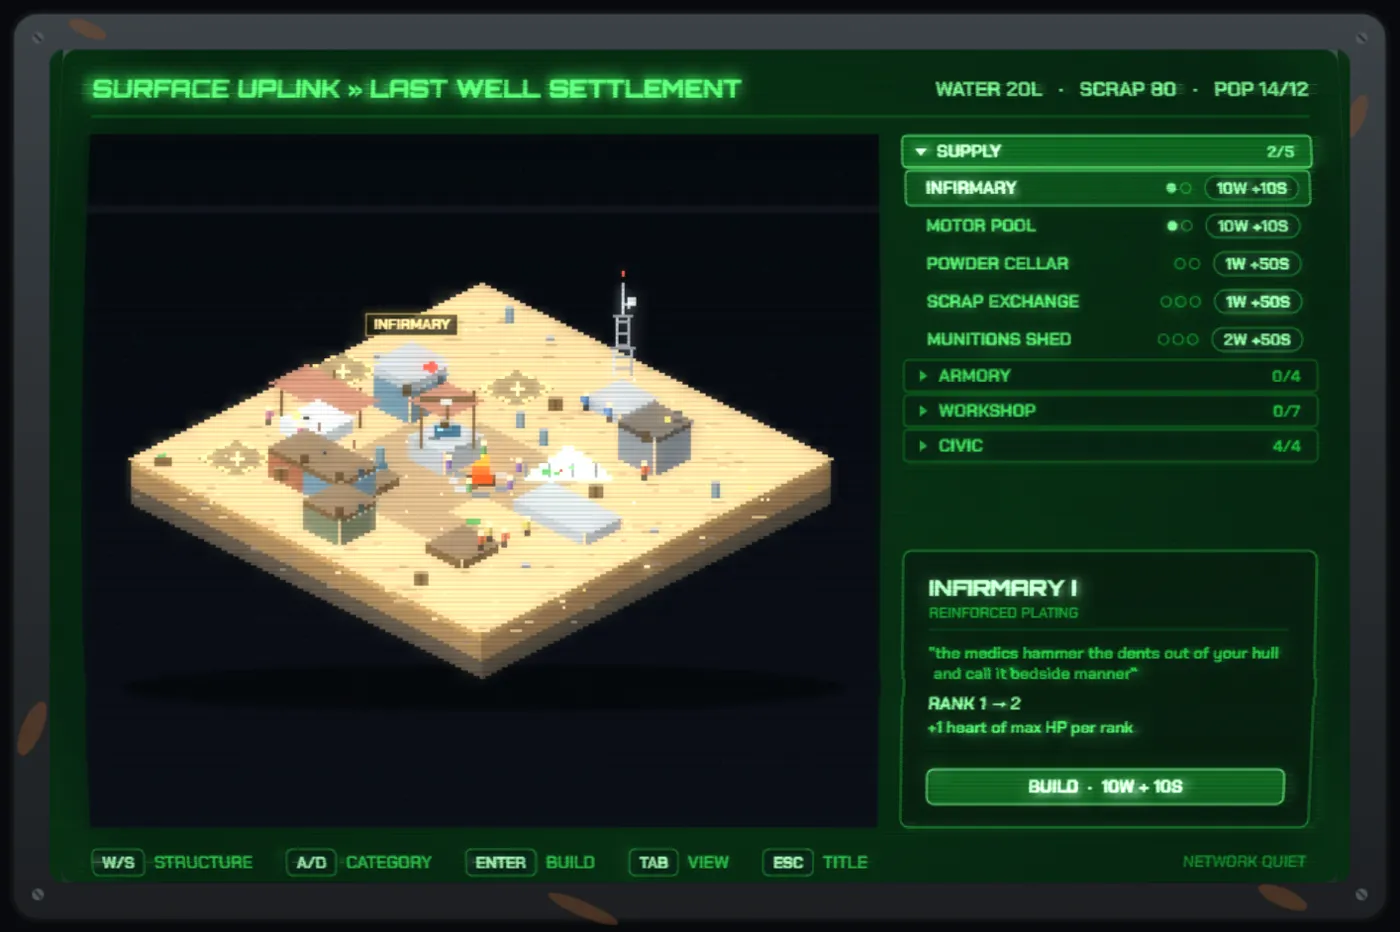
Rank 1 of a perk structure is bought with scrap (≥50); ranks 2 and up are upgraded with water (≥10).
| Structure | Category | Effect per rank | Ranks |
|---|---|---|---|
| Infirmary | Supply | +1 max heart | 2 |
| Motor Pool | Supply | +12 move speed | 2 |
| Powder Cellar | Supply | +1 starting bomb | 2 |
| Scrap Exchange | Supply | +5 starting scrap | 3 |
| Munitions Shed | Supply | +1 bomb capacity | 3 |
| Gunsmith | Armory | +0.4 damage | 3 |
| Feed Works | Armory | +0.15 fire rate | 2 |
| Boring Mill | Armory | +30 range | 2 |
| Charm Still | Armory | +1 luck | 2 |
| Lamp Works | Workshop | Forward light cone, 190 → 260 | 2 |
| Breaker Yard | Workshop | Unlocks B/K terminal recycling | 1 |
Civic — the town itself
| Building | Effect | Ranks |
|---|---|---|
| Well | Population capacity 4 → 8 → 12 → 20 | 3 |
| Greenhouse | Food supply 0 → 5 → 10 → 20 | 3 |
| Signal Tower | Half of the expedition chart unlock | 1 |
| Archive | Expedition intel stamps at ranks 2 and 3 | multiple |
Every purchase raises a scaffold that finishes after your next completed run — win or death,
either drains the whole queue. A pending scaffold blocks only further ranks of that same
structure; every other site builds in parallel. A blocked BUILD button parks amber:
STANDS AFTER THIS RUN.
Population
Population grows on run completion when food ≥ current population and you're under the well's capacity. Each new arrival drinks 1L of banked water. A run that banks 3L or more brings +2 settlers.
Transmission quality literally improves as the town grows — desaturation, noise and dropout clear as the well, greenhouse, archive, signal tower and population climb. A struggling settlement reads as near-monochrome sepia; a thriving one comes in at full colour.
Fire and gold hues are always exempt. Colour is precious.
Making contact
What the uplink console shows depends on how many times you've reached her:
- Contacts 0–1 — garble and fragments,
SIGNAL COLLAPSED. Your payload banks anyway. - Contact 2 — the third transmission locks the carrier. Mara speaks, three typewritten pages.
- Contacts 3+ — a working console: iso postcard, a read-only SETTLEMENT LEDGER, payload and E — TRANSMIT, the B/K break lines, your banked total.
The signal meter climbs 6% → 33% → 66% → 100%. ESC steps away; the world holds.
Ceremonies: GATE SEAL plays on each gate ARCHON's first kill — static, zone stamp punch, postcard with the liters counting up, a line from Mara. The ENDING fires on finale wins, once per population tier: THE FIRST RAIN (pop under 10), THE GARDENS WAKE (under 20), THE OPEN WATER (20+, when the slab becomes an island).
Expeditions
Modded runs on procedurally offered data centers. Endgame content — and one attempt each.
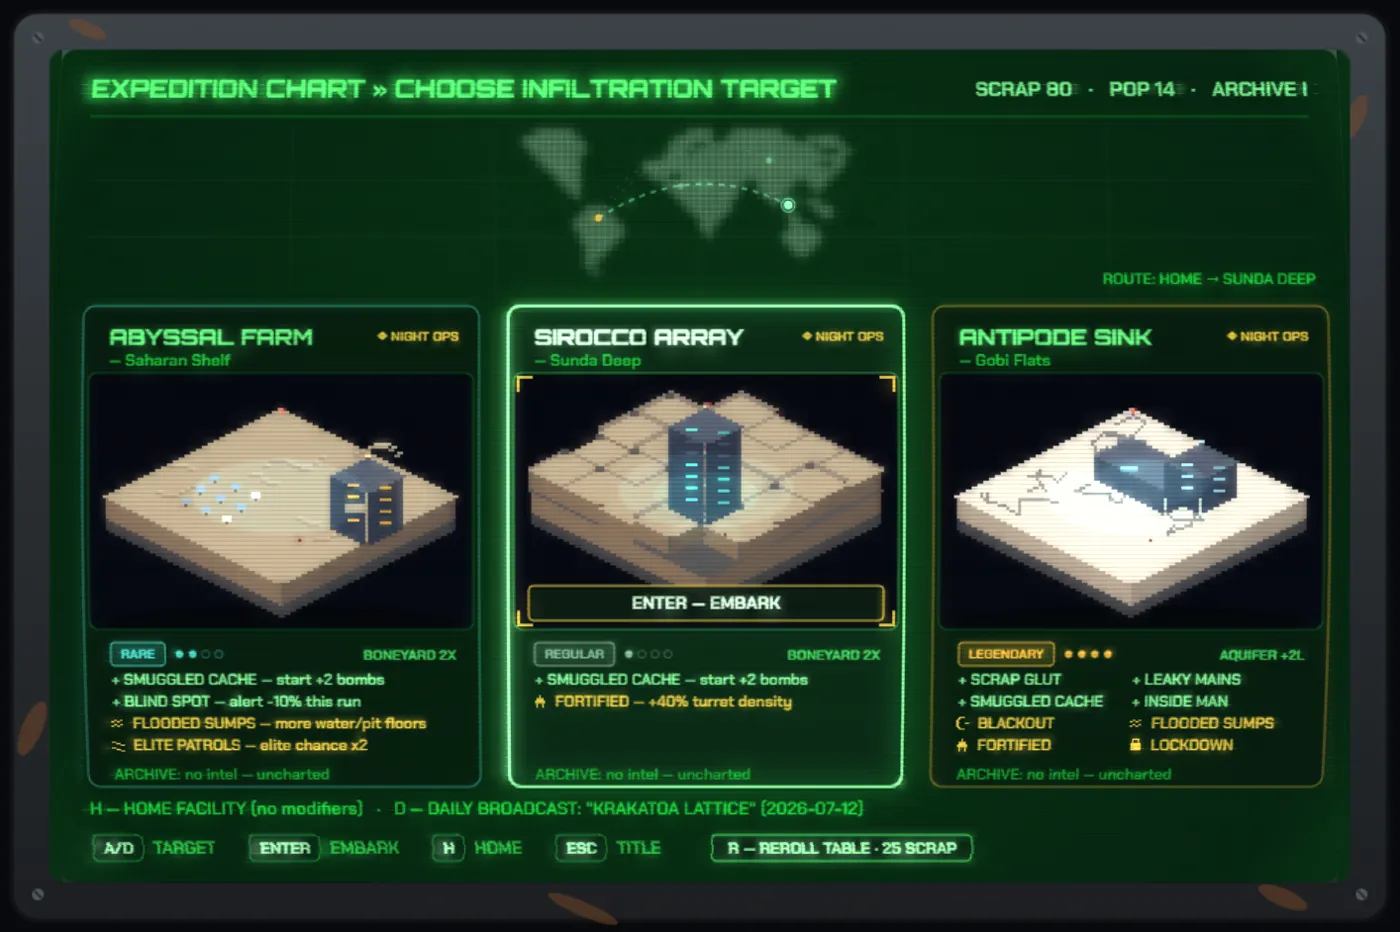
Unlock requires both the SIGNAL TOWER built and the full 15-floor descent cleared once. Until then, title-ENTER starts a plain run.
Controls: A/D select · ENTER embark · H for HOME (a plain unmodified run) · R to reroll for 25 scrap · ESC title.
| Tier | Chance | Boons + hazards |
|---|---|---|
| Regular | 55% | 1 each |
| Rare | 25% | 2 each |
| Epic | 14% | 3 each |
| Legendary | 6% | 4 each — at most one per offer table |
The mod pools
Seven
SMUGGLED CACHE +2 starting bombs · INSIDE MAN shop prices −20% · LEAKY MAINS +30% water yield · SCRAP GLUT crates ×2 · OLD MAPS treasure rooms ×2 (cap 2/floor) · BLIND SPOT alert −10% · POWER SURGE actives charge one room faster.
Six
FORTIFIED +40% turret density · BLACKOUT darkness one zone deeper · ELITE PATROLS elite chance ×2 plus a second elite room at any depth · HOT NETWORK alert +10% · FLOODED SUMPS a second reservoir floor on d4–6 · LOCKDOWN +1 keycard door per floor (always leaving a keyless route).
Two
AQUIFER +2L per water siphon · BONEYARD uplink scrap ×2.
Effects stack cleanly across tiers: multipliers multiply, deltas add, booleans latch.
Facilities carrying the hard hazard sets — fortified, elite patrols, blackout — render as NIGHT OPS slabs. ARCHIVE rank 2 stamps INTEL on cards, rank 3 stamps DEEP. Boss specifics roll mid-run and can't be previewed.
Embarking commits you. Dying on a facility run offers no retry — both game-over exits land on
the title, and the death screen says why: THE TARGET WENT DARK — ONE ATTEMPT PER FACILITY.
The chart rerolls fresh offers each visit, so the lost target is simply gone.
The daily: D on the title runs today's seed (UTC date). Once the chart is unlocked, the daily's fixed facility mods apply automatically with no chart shown; before that it's today's unmodified game. The zone card stamps the facility name on sublevel 1.
Item registry
Every item the facility can drop — the whole pool, no procedural salvage. Rarity sets the size of the boost: one item, one stat, bigger numbers as the color climbs. Milestone salvage joins the pool as your deeds unlock it.
Controls
Every screen is fully operable by keyboard, mouse, gamepad and touch. Nothing is locked to one device.
Keyboard & mouse
Six action keys — Space E R O P C — can be rebound in SETTINGS and take effect immediately. Movement, aim, ESC and ENTER are fixed.
E does exactly one thing per press, resolved in strict priority:
- Buy — a priced shop consumable or pedestal (spends scrap)
- Take — a free or blood-price pedestal item
- Pump — a charged reservoir pump
- Terminal — the uplink console
- Descend — a stairs hatch
- Place a bomb — the fallback, only when none of the above is near
You cannot accidentally bomb while standing at a shop, a pedestal, a pump, or the stairs. Step away first.
Gamepad
Left stick or D-pad move (the D-pad also navigates every menu) · right stick aims and fires · A/Cross confirms, and interacts in gameplay · B/Circle backs out, pauses, skips · Start/Options pauses. B and Start never restart — restart is always a deliberate, separate button.
| Screen | X | Y | LB | RB | Select |
|---|---|---|---|---|---|
| Gameplay | Ability | Interact | — | Ability | — |
| Title | Daily run | Surface | Mixer | Profiles | Settings |
| Paused | Restart | Settings | Mixer | — | Quit |
| Profiles | Wipe (×2) | Export | — | Import | — |
| Expedition | Reroll | Home embark | — | — | — |
| Uplink | Break bomb | Break keycard | — | — | — |
| Surface | — | Postcard | — | — | Postcard |
Touch
The first touch turns the on-screen controls on — a twin-stick layout: left half a floating
move stick, right half a floating aim-and-fire stick, PWR for the active, USE to
interact, the II chip to pause and the ✕ chip to close any panel.
- Every panel is directly tappable — title rows, option sliders, mixer bars (tap to set, auto-previews), profile slots, the uplink BREAK lines, expedition cards.
- On the pause sheet, drag to scroll the item list; a clean tap resumes.
- A tap confirms in menus but never in gameplay — a fire-tap can't confirm. And tapping a key row in SETTINGS only selects it; a tap can never arm a remap capture.
- Touch controls hide automatically if you pick up a gamepad. In portrait you'll get a
ROTATE FOR FULLSCREEN COMBATprompt.
Reading the screen
Every cue means something specific. These are the ones worth learning early.
Did it connect?
Enemy hit-flash — a bright bloom over the chassis means your shot landed. No flash, no hit. A muzzle flash at your barrel confirms a volley fired.
Hit-stop is not a stutter
A brief freeze on a solid hit or kill is deliberate weight, not a framerate drop. It is rate-limited, so a high fire rate buys you damage rather than more freezing — the freeze feels the same whatever you are holding. Inputs pressed during a freeze are buffered, not swallowed.
A clink with no damage
Metallic clink and spark, no damage = you're shooting something bomb-only. That's a fire turret. Reach for a grenade.
Where your shots went
Wall or rock: a spatter on the surface. Out of range: a soft mid-air fizzle. Enemy: a contact spark plus the target's hit-flash. Ricochet: a kick at the bounce point.
Special rooms announce early
Boss arenas carry a warning ring, an emblem and corner anchor plates. Shops have floor mats and a neon SUPPLY sign. The uplink has a raised dais, cable looms, a monitor bank and a RELAY ARRAY 7-C → SURFACE UPLINK stencil.
The tube screens
SURFACE, EXPEDITION, UPLINK and the ceremonies render as a CRT — barrel curve, a slow rolling band, occasional sync glitches. That's intentional.
Floating text holds in proportion to how much there is to read — a boss banner lingers a few
seconds while +1 scrap stays snappy. The death screen names your killer and, if you
were carrying water, states how much spilled — once, as fiction. It is not a running guilt counter.